Dirty sensors lie.
I have seen production teams blame feeders, nozzles, operators, humidity, “bad components,” and even the machine brand before anyone opened the vacuum line and found the actual villain: a sticky clot of flux mist, tape dust, and oil residue sitting between the nozzle and the vacuum pressure sensor. That is not exotic failure analysis. That is Tuesday morning in a real SMT shop.
And here is the hard truth: vacuum sensor maintenance is not a cleaning job; it is a yield-protection job.
In a pick-and-place machine, the component detection system usually reads vacuum behavior after pickup. The nozzle drops, vacuum rises, the sensor confirms negative pressure, and the software decides whether the part exists, whether the nozzle sealed properly, and whether the placement cycle can continue. When that signal gets dirty, slow, or offset, the machine does not become “slightly inaccurate.” It becomes confidently wrong.
That is expensive.
The Siemens 2024 True Cost of Downtime report estimated that large plants still lose 27 hours per month to unplanned downtime, with the world’s 500 biggest companies losing nearly $1.4 trillion annually to it. Automotive downtime alone was estimated at $2.3 million per hour in large plants. No, your SMT line is not an automotive megafactory. But the physics of idle capital is the same: stopped machines eat margin.
I do not trust “we clean it when alarms increase” as a maintenance policy. By the time vacuum sensor troubleshooting becomes visible on the HMI, the damage is already baked into missed picks, repeat nozzle checks, false reject counts, and operator workarounds.
The machine knows first. The dashboard knows second. Management knows last.
Where Vacuum Sensor Contamination Actually Comes From
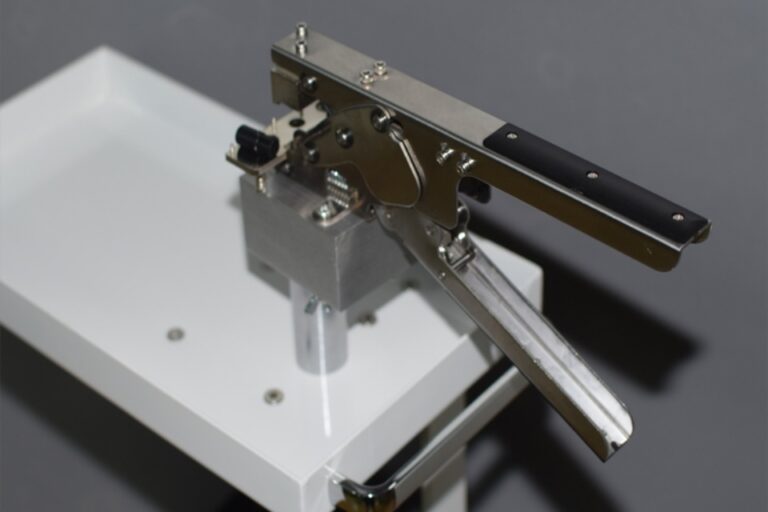
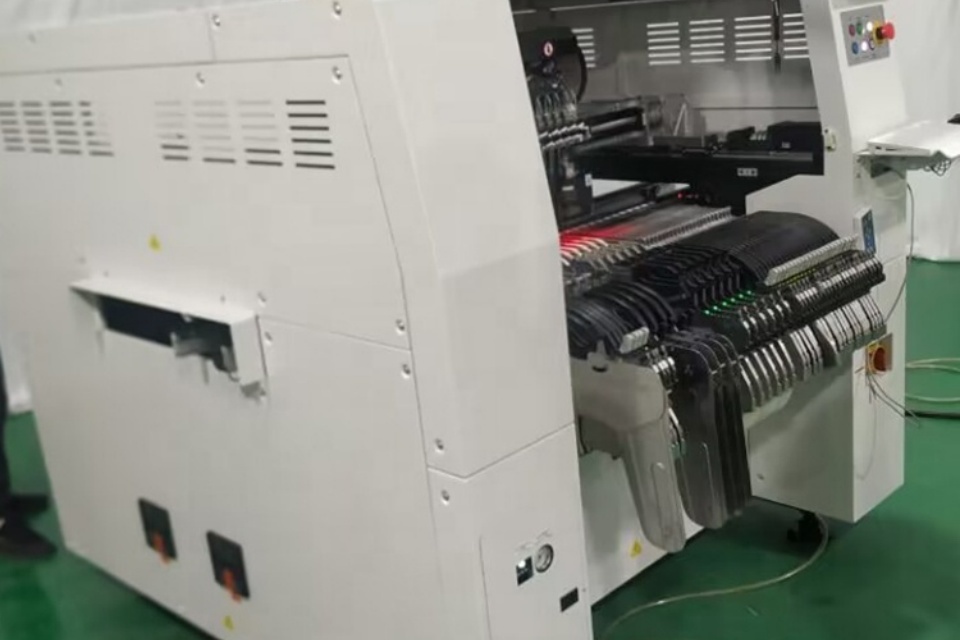
A clean component detection system starts with a clean vacuum path: nozzle tip, nozzle shaft, filter, tubing, manifold, ejector, valve, and sensor port. Skip one, and the contamination migrates back like it pays rent.
For broader line planning, this is where I would tie sensor care into a formal SMT maintenance and spares program, not a loose notebook beside the machine. Shops that run high-mix production should also keep validated nozzles, filters, and hoses under spare parts and accessories control, because cleaning is not a miracle cure for worn elastomer, cracked tubing, or a sensor diaphragm that has already drifted.
Most vacuum detection problems come from four dirty places.
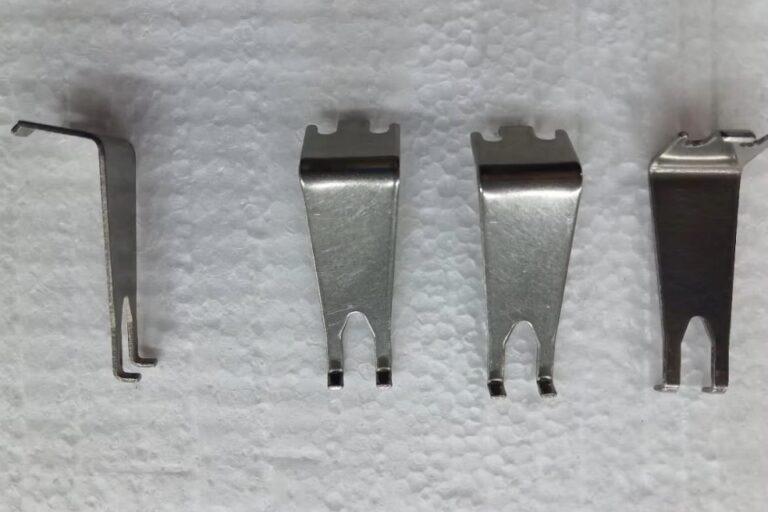
The nozzle is first. Paper tape lint, ceramic dust, solder paste residue, and adhesive debris build up around the pickup face and bore. A 0402 nozzle does not need much contamination to lose seal quality.
The filter is second. Many teams treat vacuum filters like permanent furniture. They are not. A loaded filter changes response time, not just flow rate, and that is why the machine may pass static vacuum but fail during fast placement.
The hose and manifold are third. Oil in compressed air systems, degraded tubing, and fine dust collect in low points and bends. You clean the nozzle, run ten boards, and the line “mysteriously” returns to the same fault.
The sensor port is fourth. This is where people do real damage. They attack it with a pin, blast air into it, or flood it with solvent. Then they call it cleaning.
It was surgery. Bad surgery.
The OSHA Occupational Noise Exposure technical manual is written for worker exposure and noise control, not SMT yield, but the lesson transfers cleanly: careless compressed-air cleaning can move contamination instead of removing it. In SMT, open-air blasting around sensors often moves dirt from one failure point to another.
So, should you use compressed air? Only with discipline. Never blast directly into a vacuum pressure sensor port. Disconnect the line first, protect the sensor, and use low-pressure clean dry air or nitrogen only where the machine manufacturer permits it. If the manual says replace the micro-filter, replace it. Do not “save” a $3 filter and risk a $30,000 placement-head problem.
The Maintenance Workflow I Would Actually Enforce
The unpopular opinion: operators should not own vacuum sensor maintenance. They should own first-level cleaning and reporting. Maintenance should own diagnosis, calibration, and replacement. Engineering should own thresholds and trend data.
Why?
Because operators are paid to keep production moving, and production pressure rewards bad habits. “Just increase the vacuum threshold.” “Just disable that nozzle.” “Just clean it again.” These are not fixes; they are debt.
In 2024, Fraunhofer IPT described a deep-learning quality-control system that detects defects during production and can process production data locally in a real-time-capable cloud environment. That matters because factories are moving toward faster, sensor-heavy quality loops; a dirty vacuum sensor is no longer a local mechanical nuisance, it is bad input into an increasingly automated decision chain through real-time quality control research.
Bad data scales beautifully.
For high-speed mass production, dirty vacuum detection creates a special kind of mess: the line may keep moving, but every retry, every false reject, every nozzle skip, and every operator intervention creates hidden cycle-time leakage. If that sounds familiar, compare your maintenance logs against your actual line design under high-speed mass production line planning. In prototype and NPI work, the pain is different: low volume hides repeatability problems until the customer build suddenly matters, which is why prototype and small-batch SMT lines still need disciplined vacuum pressure sensor maintenance.
A serious vacuum sensor cleaning routine should look like this:
Power down safely, vent vacuum and compressed air, and follow lockout procedures. Photograph the tubing before removal. Mark each line. Remove the nozzle, filter, and tubing section in order. Inspect under magnification. Clean the nozzle and accessible fittings with approved solvent and lint-free tools. Replace filters rather than performing fake heroics. Check tubing for hardening, clouding, oil, flattening, and micro-cracks. Reassemble without swapping ports. Run vacuum zeroing and threshold calibration. Test with known-good nozzles and representative parts: 0201, 0402, QFN, BGA, odd-form, or whatever your line actually places. Log vacuum level, response time, and reject rate before and after.
Not glamorous. Effective.

Vacuum Sensor Maintenance Checklist and Failure Table
| Maintenance point | What usually contaminates it | Bad symptom on the line | Proper action | Hard rule |
|---|---|---|---|---|
| Nozzle tip and bore | Tape lint, dust, solder paste film | Random missed picks, weak pickup on small chips | Clean with approved nozzle cleaner, lint-free swab, or ultrasonic process if allowed | Do not scrape precision bores with steel wire |
| Vacuum filter | Dust, oil mist, component debris | Slow vacuum response, unstable pickup confirmation | Replace on schedule; do not only clean visually | If response time changes, treat the filter as suspect |
| Vacuum tube | Oil residue, internal dust, cracks | Good static vacuum, bad dynamic detection | Replace aged tubing; inspect bends and fittings | Tubing is cheaper than downtime |
| Manifold/ejector | Mixed residue, degraded seals | Multiple nozzles show similar faults | Clean per OEM procedure; check seals and valves | Shared faults usually mean shared plumbing |
| Sensor port | Fine particles, solvent residue, oil | False part-present or false missing-component alarms | Clean externally only unless OEM procedure allows port service | Never poke the sensing element |
| Software threshold | Drift after cleaning or replacement | Picks pass mechanically but fail logically | Re-zero, calibrate, and log kPa values | Cleaning without verification is theater |
For teams buying used or refurbished machines, I would inspect the vacuum circuit before I believed the hour meter. Heads can look clean from the outside while the vacuum manifold tells the real history. If you are comparing machine platforms or rebuilding a line, start with the actual equipment category under pick-and-place machines and match nozzle, feeder, and maintenance practices to the components you run most often. And yes, nozzles deserve their own discipline; the SMT nozzle category is not an accessory shelf, it is part of placement accuracy.
The best vacuum sensor cleaning best practices are simple, but they are not soft.
Clean by schedule, not only by alarm. Replace filters before they become diagnostic mysteries. Do not blast sensor ports. Do not pierce clogs with random metal. Do not change thresholds to hide contamination. Track vacuum readings by head and nozzle position. Separate nozzle cleaning from sensor maintenance. Train operators to report patterns, not folklore.
And keep solvents under control. Isopropyl alcohol, commonly written as C₃H₈O, is useful in electronics cleaning, but residue, overuse, and compatibility mistakes can hurt plastics, seals, labels, and sensor components. The correct solvent is the one approved by the equipment or component manufacturer, not the one someone found in a cabinet.
There is a reason experienced maintenance people smell the nozzle area before they touch the software. Oil mist tells a story. Burnt flux tells a story. Damp dust tells a story. A clean HMI tells almost nothing.
FAQs
Why do vacuum sensors need cleaning in component detection systems?
Vacuum sensors need cleaning because SMT placement machines rely on stable negative-pressure readings to confirm that a component has been picked, held, and released correctly, and contamination in the nozzle, filter, tube, manifold, or sensor port can distort that signal before a visible mechanical failure appears.
The real risk is not just a missed pickup. It is false confidence. A dirty sensor may report “part present” when the nozzle seal is marginal, or report “missing part” when the part is fine but the vacuum response is delayed by a loaded filter.
How often should vacuum sensor maintenance be performed?
Vacuum sensor maintenance should be performed on a fixed schedule based on production volume, component mix, dust level, and nozzle size, with high-speed SMT lines often requiring daily nozzle checks, weekly vacuum-path inspection, and scheduled filter replacement before alarms or placement defects increase.
For dirty environments or paper-tape-heavy production, tighten the interval. For clean, stable, low-volume production, extend it only after reviewing vacuum trend data. Calendar-based maintenance without kPa readings is better than nothing, but trend-based maintenance is better.
How do you clean vacuum sensors without damaging them?
You clean vacuum sensors safely by isolating power and air, removing upstream contamination first, replacing filters, cleaning accessible fittings with approved lint-free materials, and avoiding direct mechanical contact with the sensing element unless the equipment manufacturer provides a specific service procedure.
Do not stick needles into sensor ports. Do not flood the port with solvent. Do not blow high-pressure air into the sensor. Clean the vacuum path, protect the sensor, then verify zero point and pickup thresholds through the machine software.
What are the signs of a dirty vacuum sensor?
A dirty vacuum sensor usually shows up as intermittent missing-component alarms, false pickup confirmation, slow vacuum response, inconsistent readings across nozzles, repeated failures on small passive components, and faults that follow a head position or vacuum channel rather than a specific feeder or reel.
The giveaway is inconsistency. If the same feeder runs well on one nozzle but fails on another, stop blaming the tape immediately. Check the nozzle, filter, tube, valve, manifold, and sensor channel in that order.
When should a vacuum pressure sensor be replaced instead of cleaned?
A vacuum pressure sensor should be replaced when readings remain offset after cleaning and calibration, response time stays unstable, the sensor port is contaminated beyond safe service limits, the housing is damaged, or repeated false detection occurs after filters, tubing, nozzle, valve, and software thresholds have been verified.
Cleaning is not resurrection. If the sensor diaphragm has been abused with solvent, oil, debris, or physical probing, replacement is cheaper than chasing ghost faults across three shifts.
Conclusion
If your component detection system is already producing false alarms, missed picks, or unexplained nozzle-by-nozzle variation, stop treating it as “operator noise.” Audit the vacuum path, replace the cheap wear parts, document the readings, and bring in proper support if the fault survives cleaning. For service planning, training, and line-level maintenance structure, start with training and after-sales support before the next dirty sensor turns into a production meeting nobody wants to attend.